

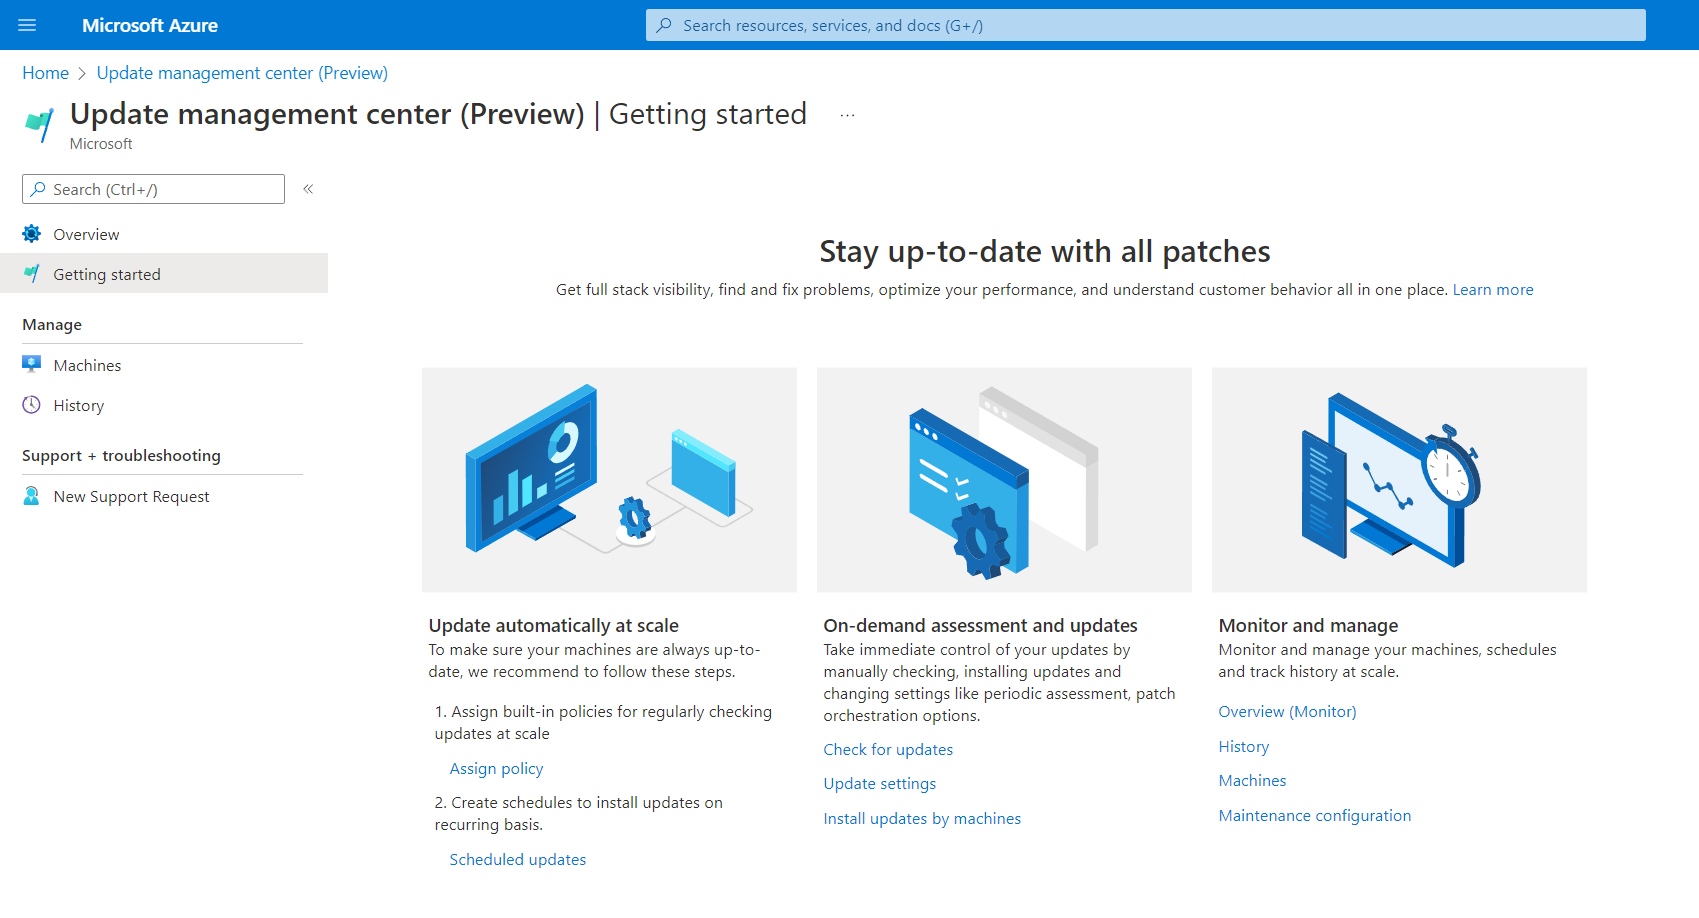
The Update Management Center finally dropped publicly! Just like the “Update Management” feature from Azure Automation the UMC supports Azure, on-prem and other cloud providers. As long as you can install the agent, you can manage the machine. Even better, when AA’s update management is already being used you can shift the workload without interruption (although that’s not recommended yet). The biggest difference I noticed is, that it doesn’t require Azure Automation or Log Analytics – but lets get ahead of ourselves. This article focuses mostly using on-premises servers and ConfigMgr – if you want to onboard Azure VMs or similar please consult the documentation.
- Supports Windows and Linux (limitations apply for the agent and for the service itself) – even Windows Server 2008R2 is on that list though…
- Support for several update sources (Microsoft Update, WSUS, YUM or APT package repos)
- Supports OS, First Party and third party (through SCUP or on Linux custom repos)
- Preparing the environment
- Add the resource providers
- Enable the preview features
- Setup the service principal (and create a secret that doesn't expire after a month)
- Finish the enrollment script
- Not great for scale? Configuration Manger to the rescue!
- Shifting the update workload from ConfigMgr to UMC
- Deploying the agent and iron out issues
- Working with the UMC
- The Azure extensions
- Conclusion
Preparing the environment
During this setup I will only use on-premises virtual machines hosted on a Hyper-V host. For our test we need to make ourselves an Azure Arc-enabled server. First you will need to verify the resource providers available in your subscription and adjust them if required – otherwise the process will fail. You may chose to use the Azure Portal or PowerShell as described on that page. I will go for the GUI option here.
Add the resource providers
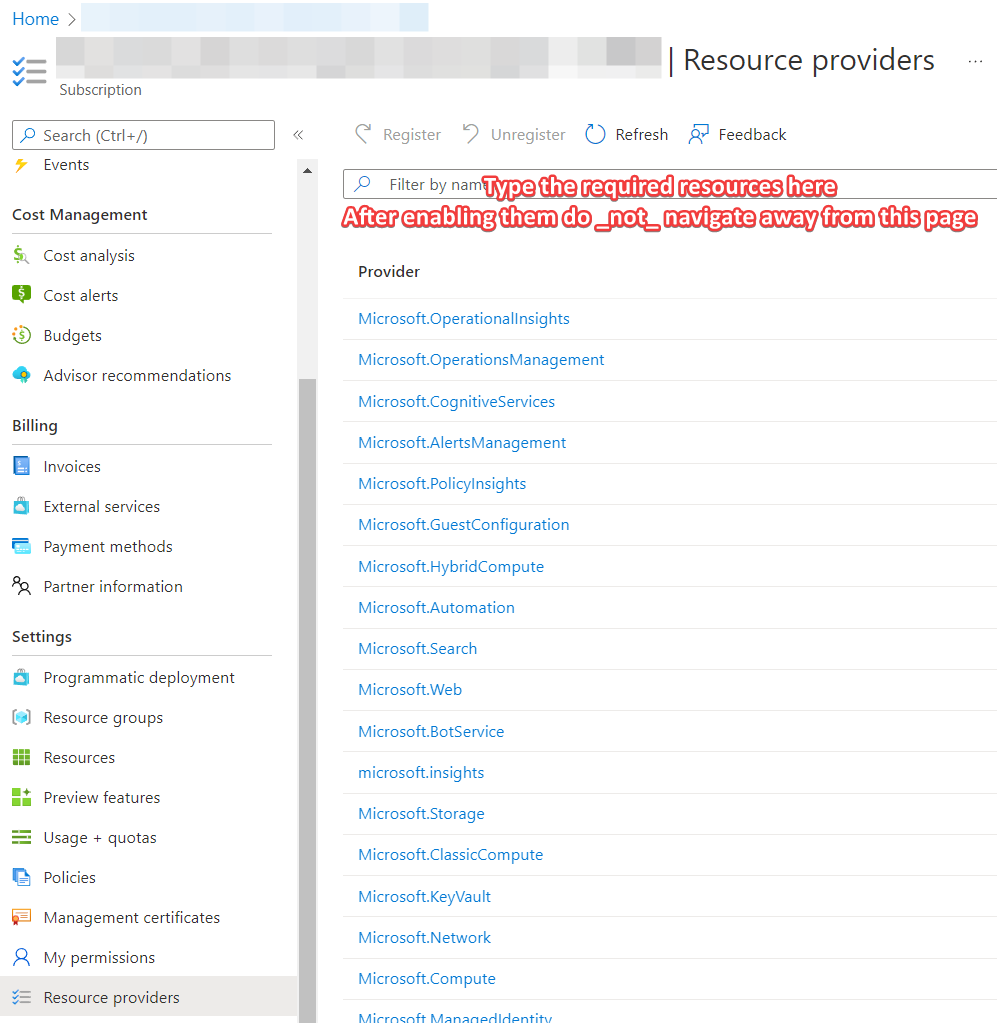
To add the resource providers required, navigate to the subscription you want to use and select “Resource providers” on the left side menu. Find the resource providers, click on the free space next to the text, not the text itself and register them one by one. Do not navigate away from that page or use the refresh button from your browser. Give it a few minutes and use the button that says “Refresh”. Add the following resources – in my case only the last one was missing and took about 5 minutes to enable:
- Microsoft.HybridCompute
- Microsoft.GuestConfiguration
- Microsoft.HybridConnectivity

Enable the preview features
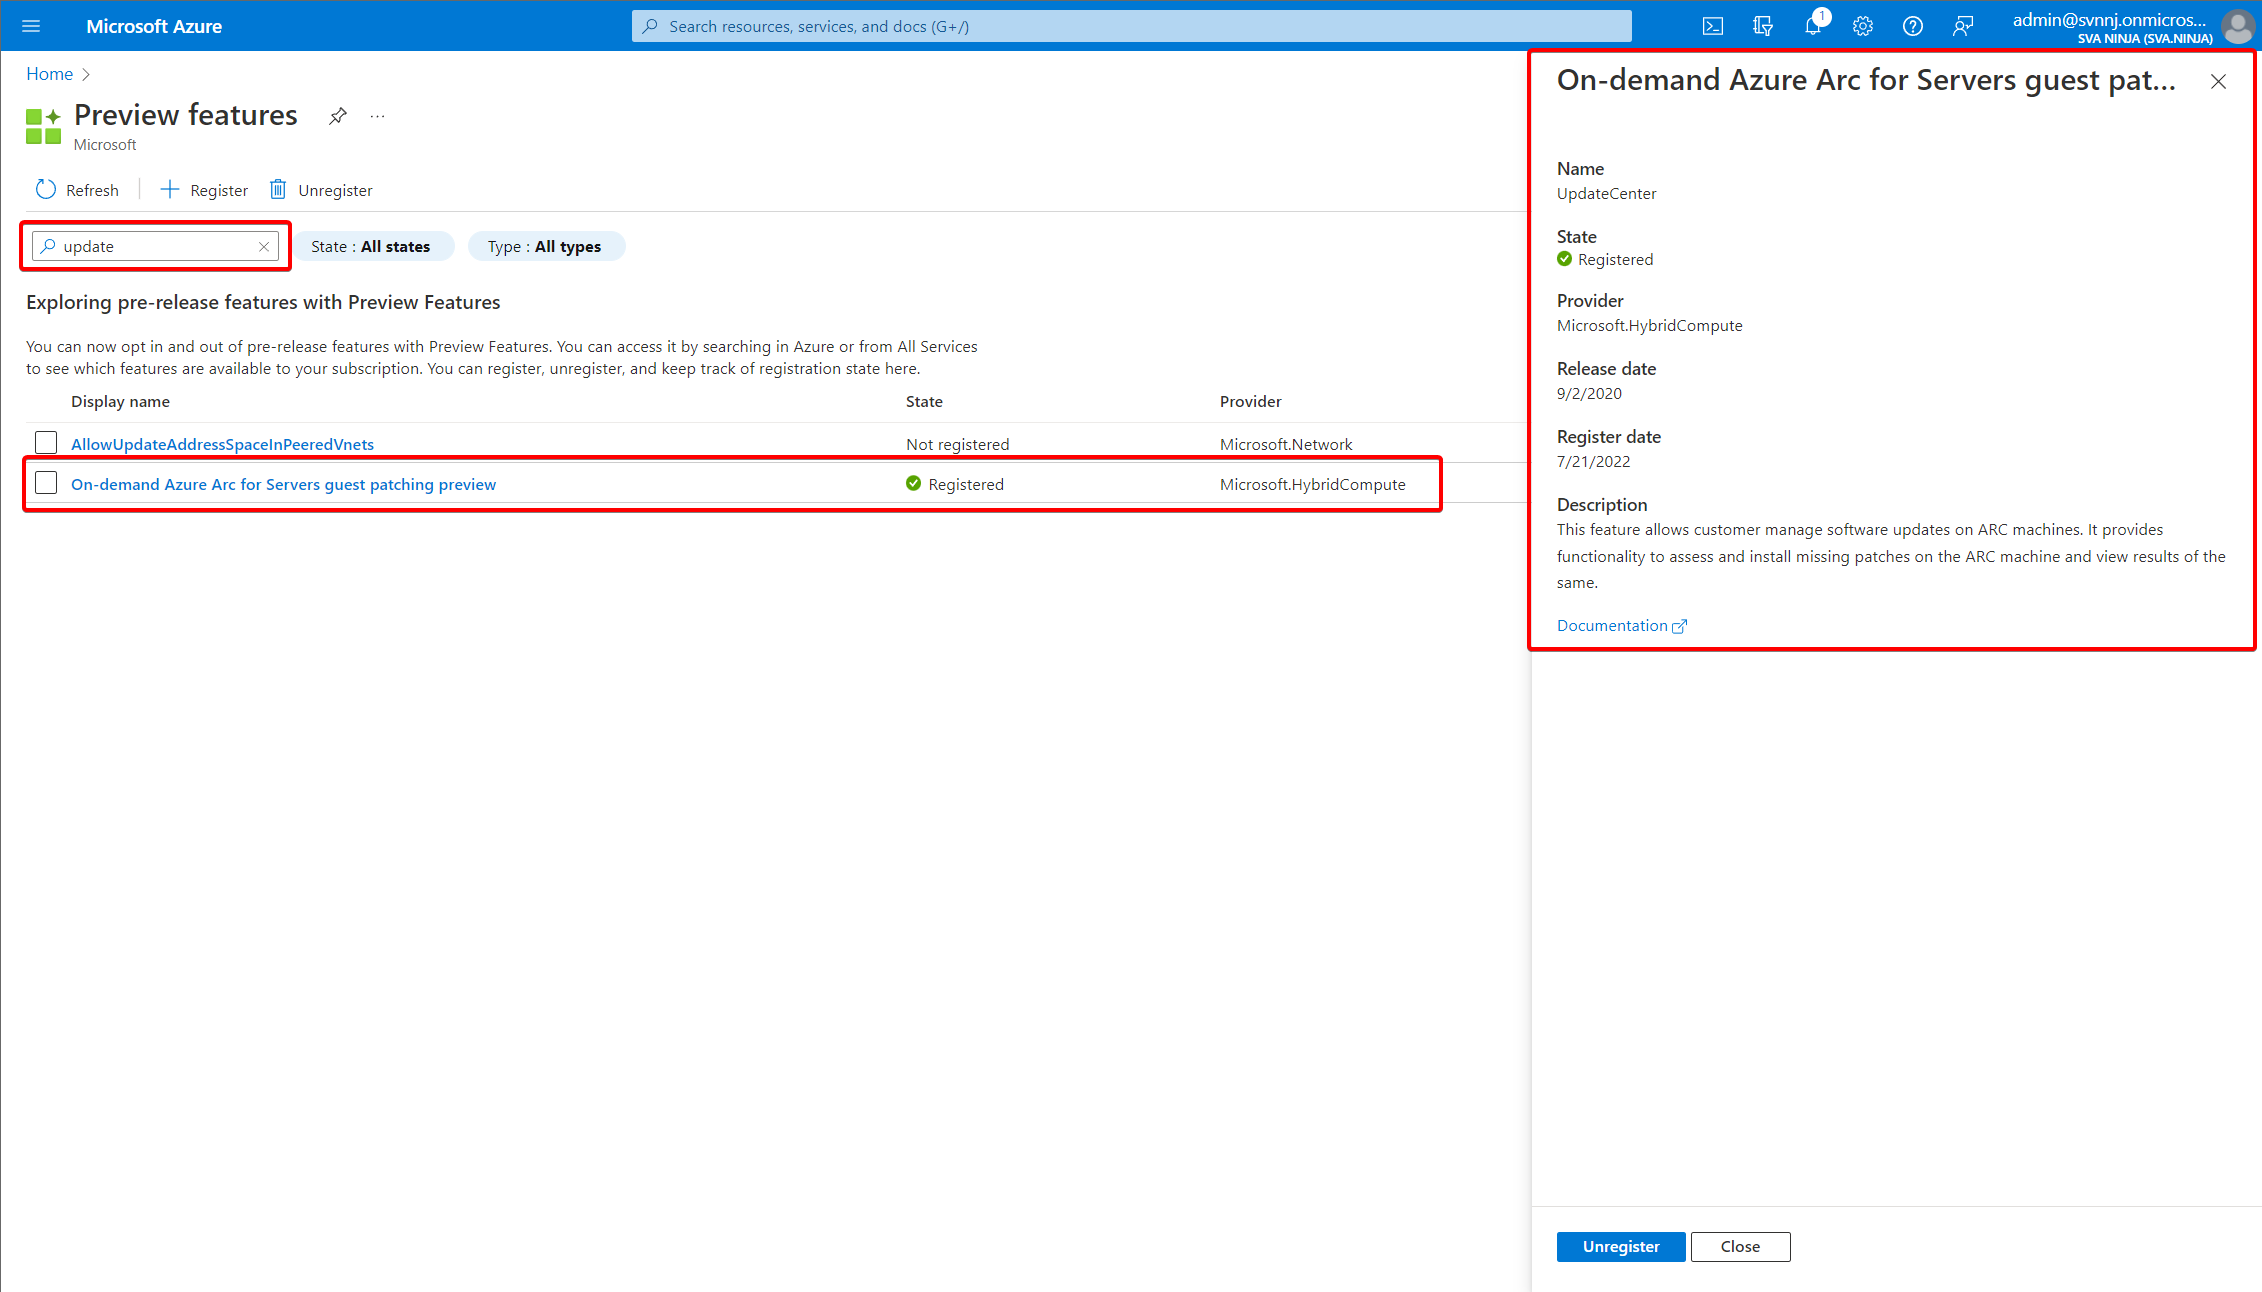
Now, here’s something that I only found about later – three evenings into troubleshooting mind you. I might talk about this in a bit, but for now visit the preview page of your tenant here Preview features – Microsoft Azure and search for “Update” and register for the preview called “On-demand Azure Arc for Servers guest patching preview”. Mind you this isn’t something that is listed as prerequisite in the documentation – it was found with the help from someone at the great Winadmins Discord.
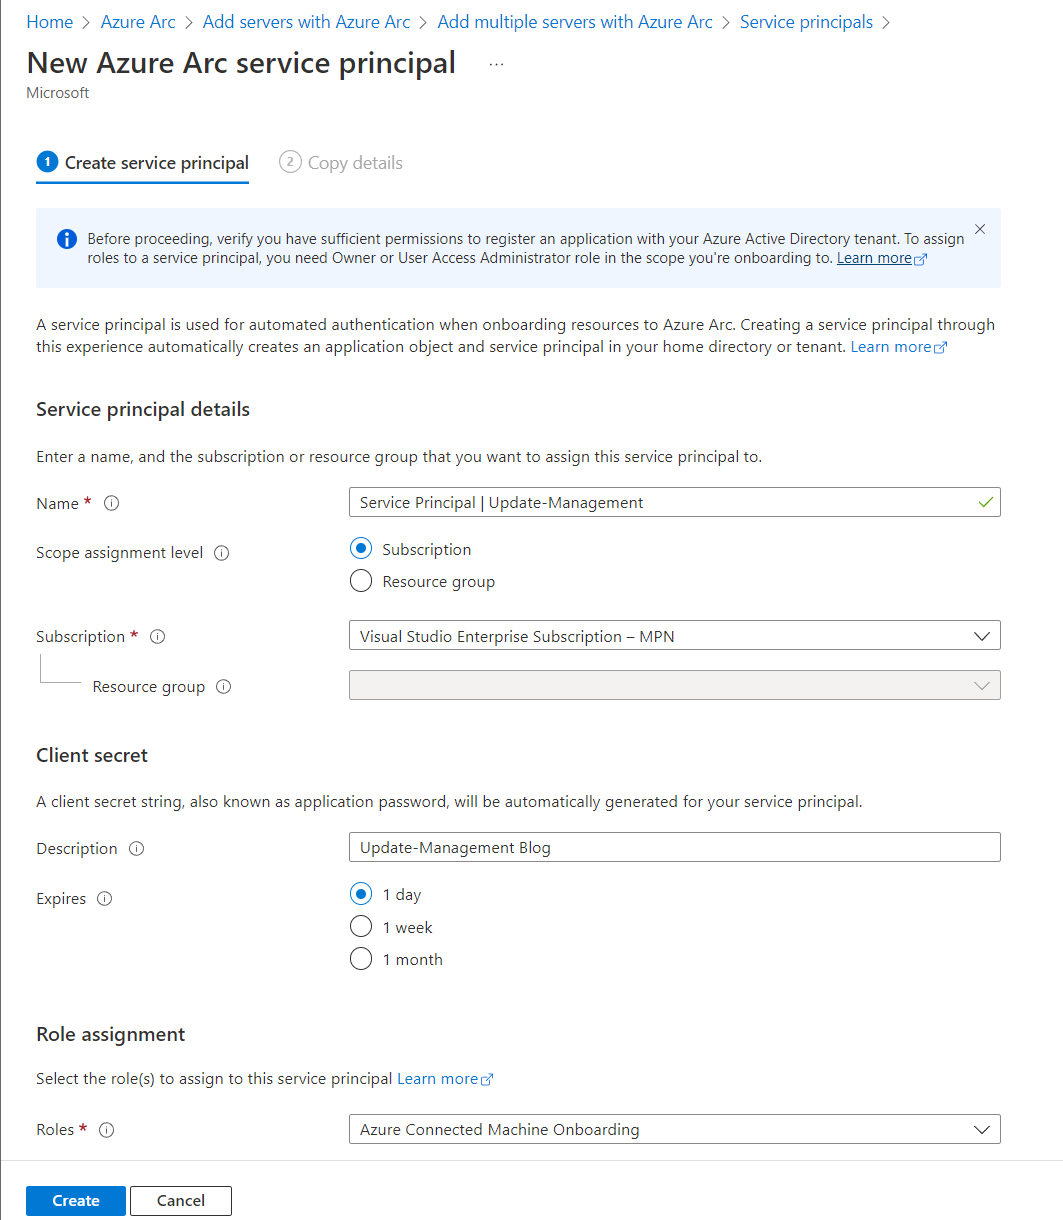
Setup the service principal (and create a secret that doesn’t expire after a month)
From the Azure Arc page, we can add servers via script. This isn’t great for scale by itself, but for our lab deployment that will do. Do not pick the option “Add servers from Update Management (preview)”. That will add the servers to the Azure Automation Update Management. Use the “Add multiple servers with Azure Arc” option instead. Select or create a resource group to your liking. You will need an Azure Service Principal and the assistant will guide you through creating one. Be careful when selecting the scope for this account, I picked “subscription” here as this is a lab. I recommend picking only the resource groups required. You should pick the resource group, that is supposed to hold your Arc-enabled servers.
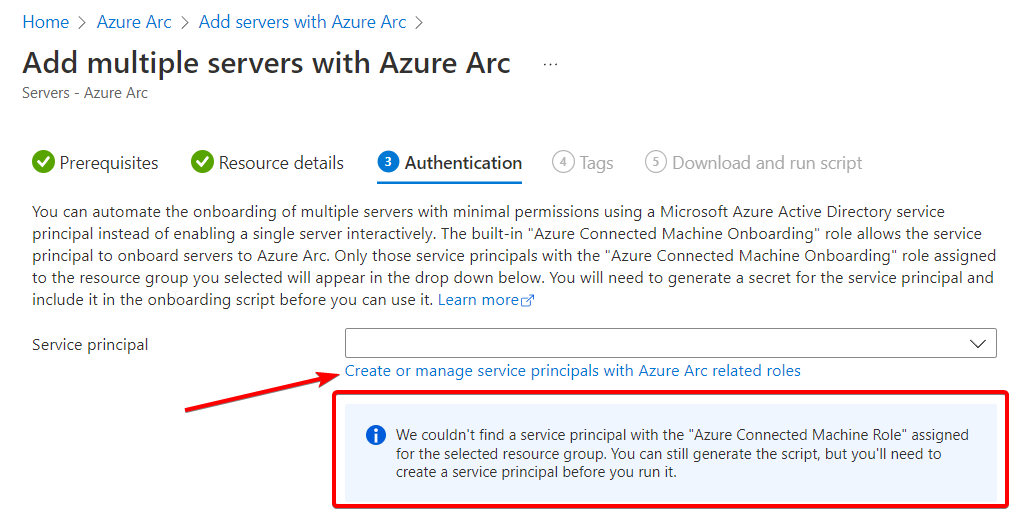
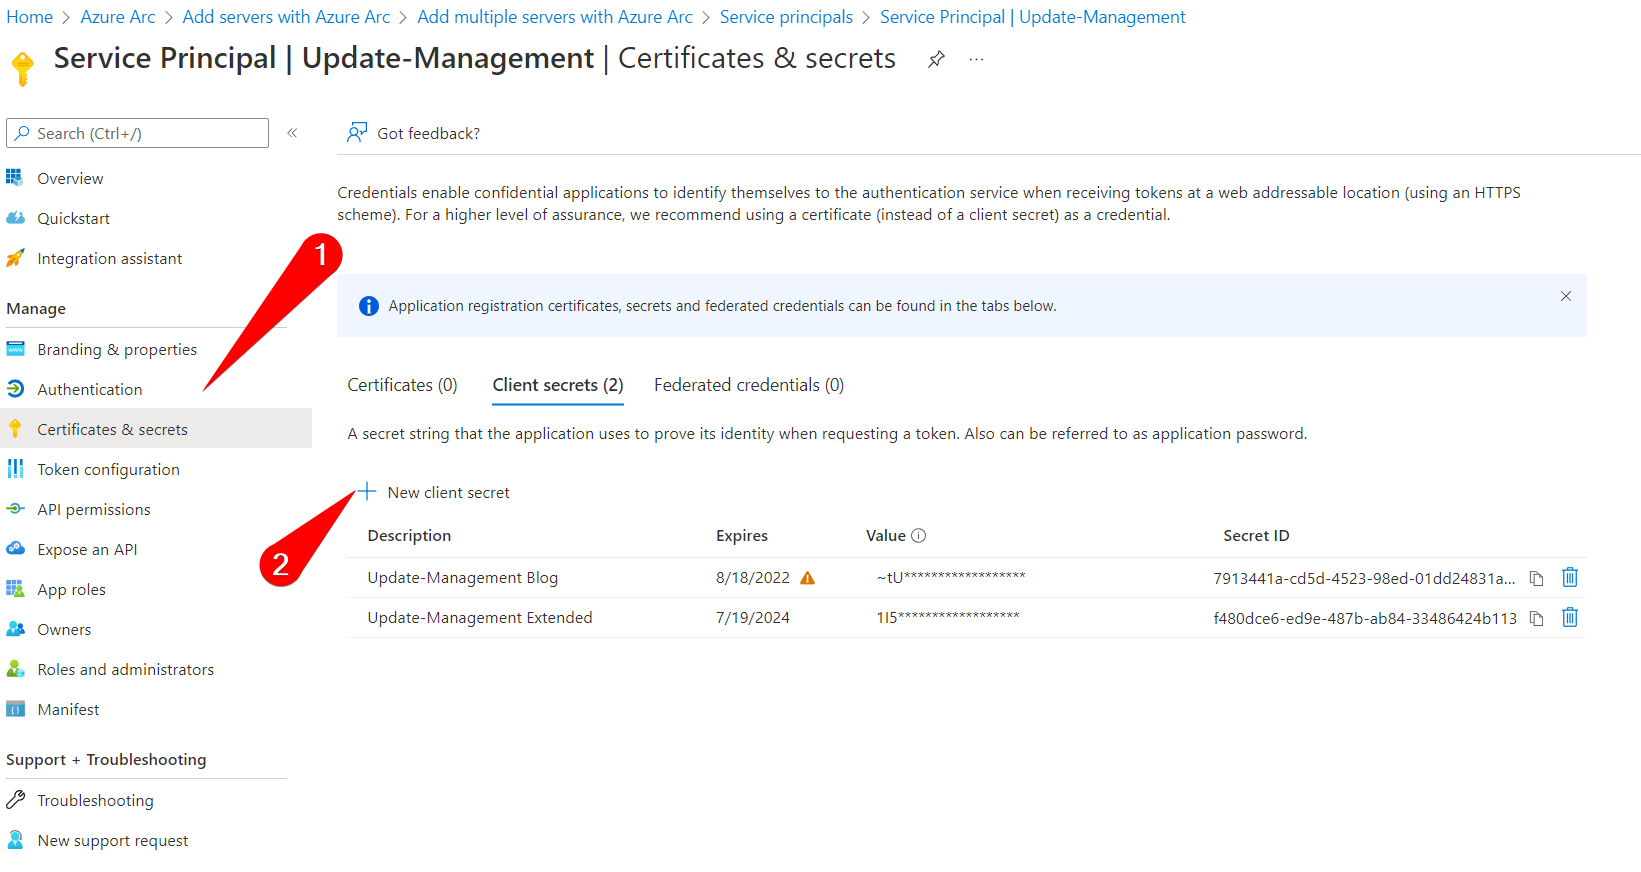
But wait! One day, one week or a month isn’t enough to enroll my machines! Well, good news. You can add a secret to the service principal that is valid for 24 months. While still on the service principal page, selecting the account again, switching to “Certificates and secrets” will let you add an additional secret we can use in our script. If you’ve navigated away don’t worry too much if you can’t find the page again. As I learned doing this exercise a service principal is an Enterprise Application, but harder to find. Navigate to the enterprise applications in your tenant. Remove the filter for “Application type” and search for the name of your service principal. You will end up on the same page.

Finish the enrollment script
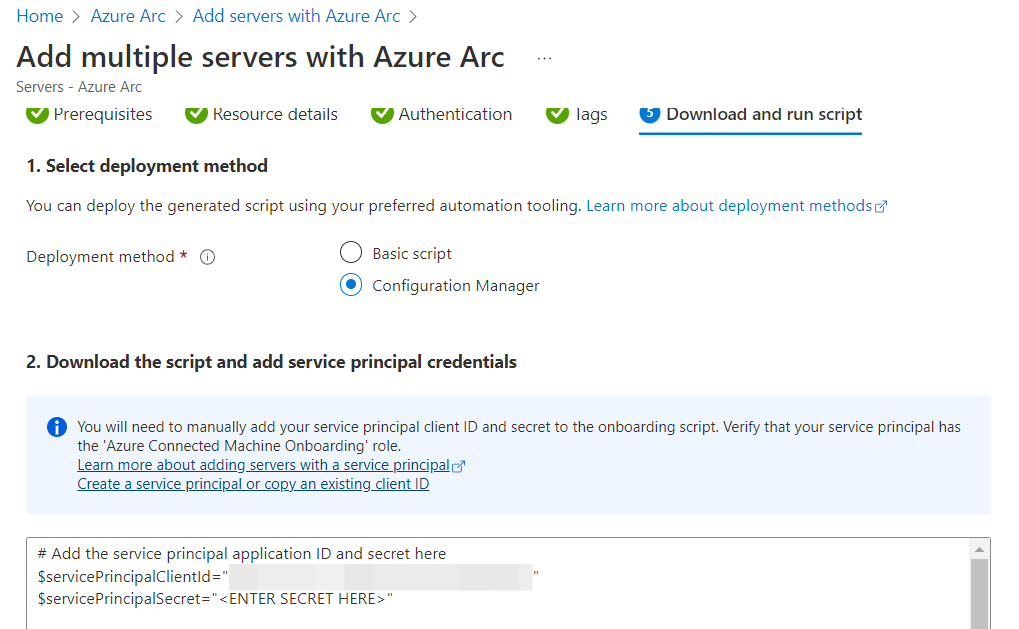
Continue with the setup of your Azure Arc enrollment script. By filling the appropriate fields with the default and/or additional tags, the machines can later be identified and grouped more easily. I recommend you sit down and fill these out. Of course, you can always just change the values in the script later on. Select “Configuration Manager” and save the script somewhere on your CM environment with the secret already at the appropriate field in line 2.
Not great for scale? Configuration Manger to the rescue!
One topic that wasn’t mentioned in the docs (yet) is how to shift the update workload from Microsoft Endpoint Configuration Manager to UMC. This should be similar to using other management tools like Ivanti, Baramundi or Empirum. So we will attempt just that, using the script we just built and this nifty documentation. I’m not super into installing multiple agents, but if you’re moving across two platforms like this gradually it might be a scenario. In this case we can leverage MECM to deploy the script we just received, while keeping our sweet sweet Hardware Inventory. Of course, this comes with the drawback, that the targeted machines must connect to the required (public) endpoints. Yes, using a private S2S VPN or Express Route is possible, but that’s a topic for another day.
# Add the service principal application ID and secret here - the rest of the script is fine. You may want to adjust the output of the default script, because it will return - in verbose - all of the setup information.
$servicePrincipalClientId="THIS BE THE CLIENT ID - its prefilled"
$servicePrincipalSecret="<ENTER SECRET HERE>"

Shifting the update workload from ConfigMgr to UMC
The next few steps are not required. You can absolutely add the client and just gather the information in UMC. However, the goal of this post was to actively manage the updates by UMC instead of CM.
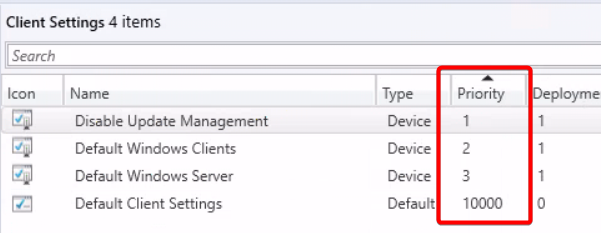
After we added the script to MECM, I added a collection and the test device to that collection. You can scope the collection however you want, the important bit is that we will deploy a custom device setting to it. Make sure the priority is above your current settings. Verify by checking the machines resultant client settings in CM.

Deploying the agent and iron out issues
Deploying the script to target machines will instantly download and install the agent. Keep this in mind, when you deploy this script to hundreds of servers. You might want to consider a real CM-Application for larger environments and using the task sequence method. The required installations and command lines are in the script provided earlier, but by default the logging options are missing. Oh – and maybe exclude certain folders from your Endpoint Protection solution first (see “The Azure extensions)”. Installation takes about 5 minutes or less depending on the VM speed and internet bandwidth. Keep in mind, that the script will run in system context and doesn’t necessarily have access to the internet. Running the script manually will yield the following result.

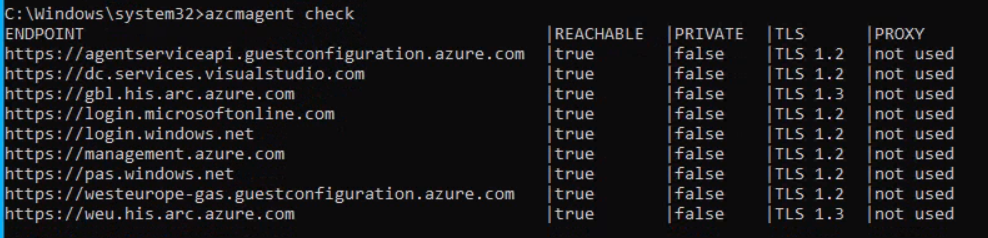
You should keep the error codes table for the agent at the ready. I luckily only had to use them once due to AZCM0081. If you get that error, delete the machine in Arc, verify the connectivity for the system account (because I didn’t before) and try running the script again. Using an administrative command-line and azcmagent.exe show will give ample information about the success of the installation, the parameter check will verify endpoint connectivity. You’re now done with setting up UMC.
Working with the UMC
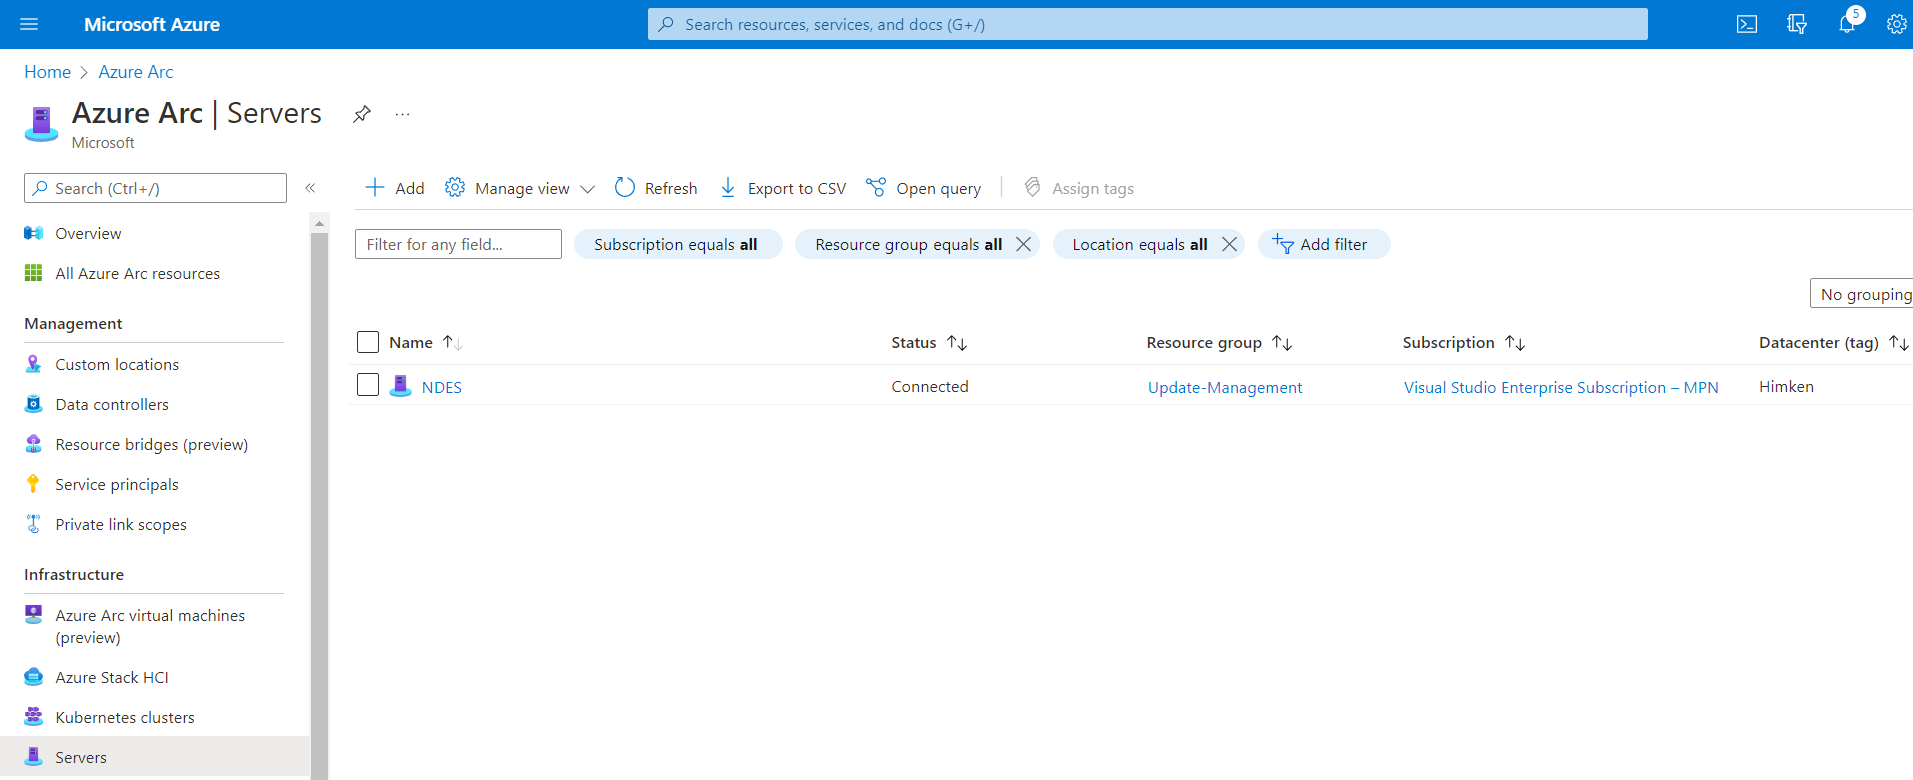
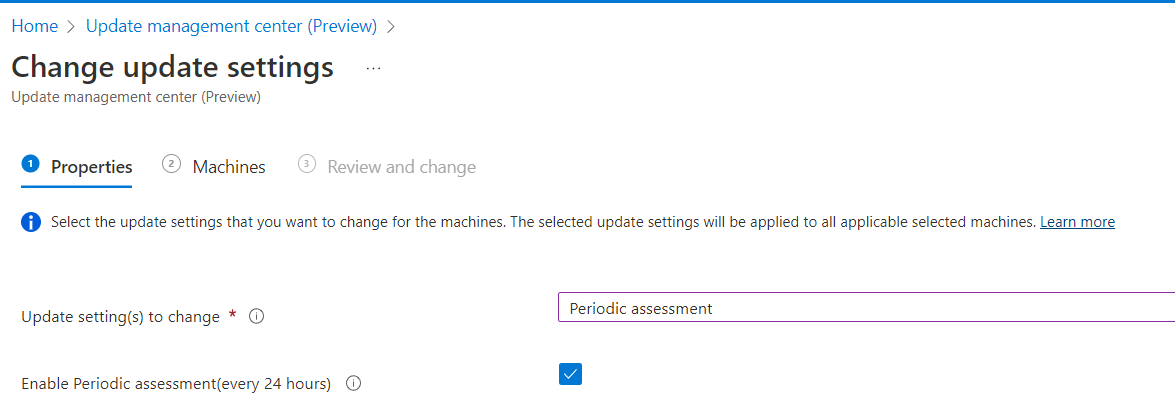
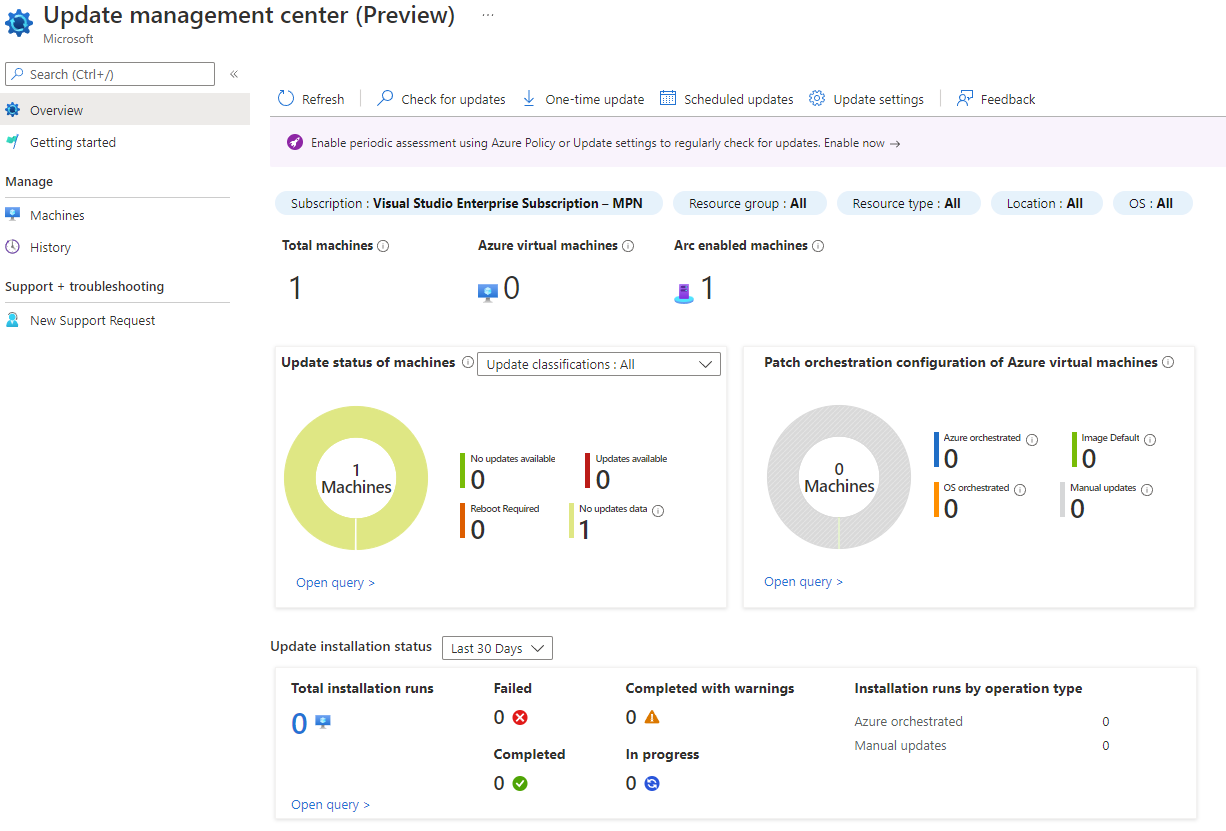
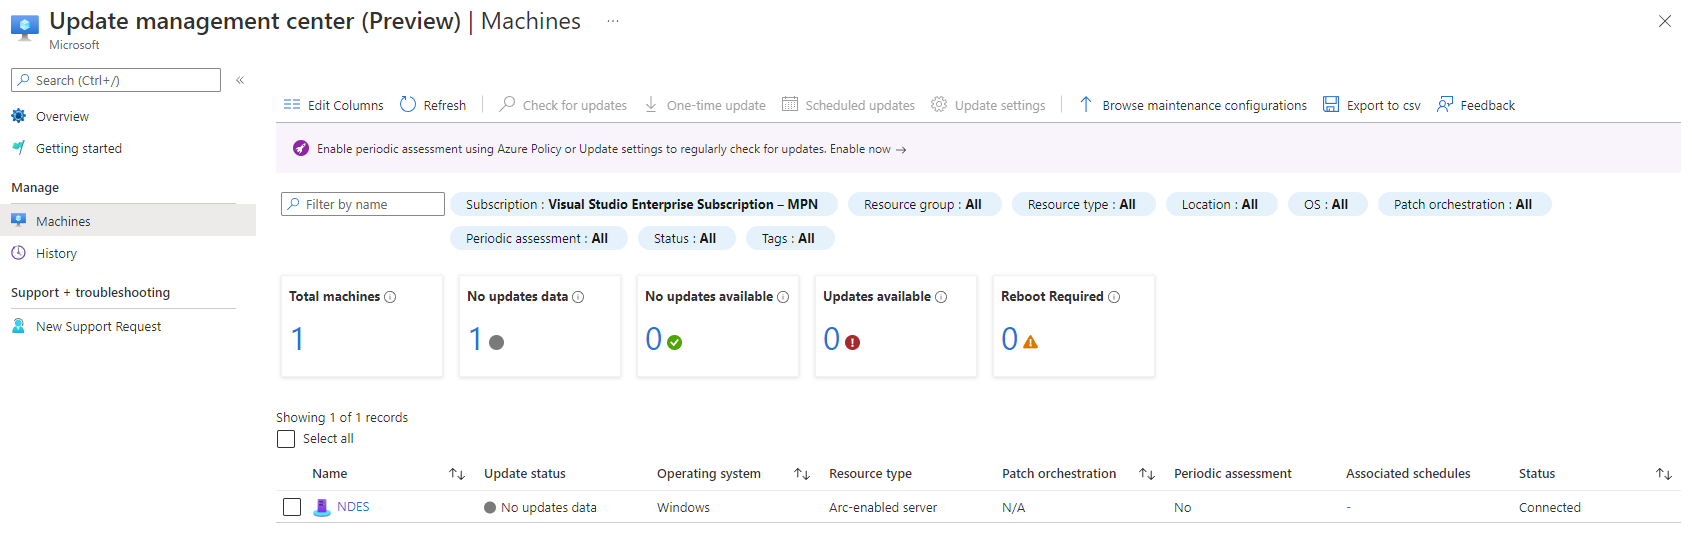
Now that we’ve added a server, it will take only a few minutes (currently) to make them show up in the overview of UMC. Notice, how the “Machines” page will also provide a “connected” status indicator, giving you yet another chance to verify your successful connection. UMC will – by default – not collect information about updates automatically. You can either run the detection manually (or triggered with other methods) or every 24 hours. Currently an Assessment is set to every 24 hours by default and cannot be customized, but that should be enough for now. To setup this option, select “Update settings” at the top, use the checkbox and select the machines it should scan. Again, this applies only to on-premises “Arc-enabled” servers. The required extension(s) on the server won’t be installed unless the machine has run an assessment either by triggering one manually or by a periodic assessment.
The assessment and other actions are immediate, as in servers send a heartbeat every 30 seconds (according to the logs) and everything that is sent to them will be instantly triggered. Keep this mind when using the “Check for updates” button.
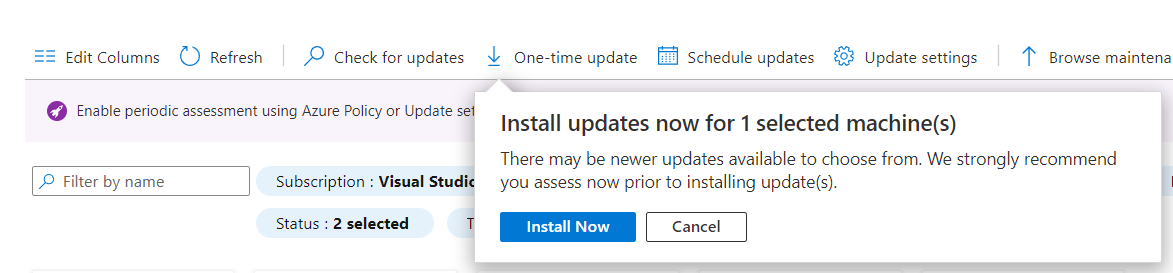
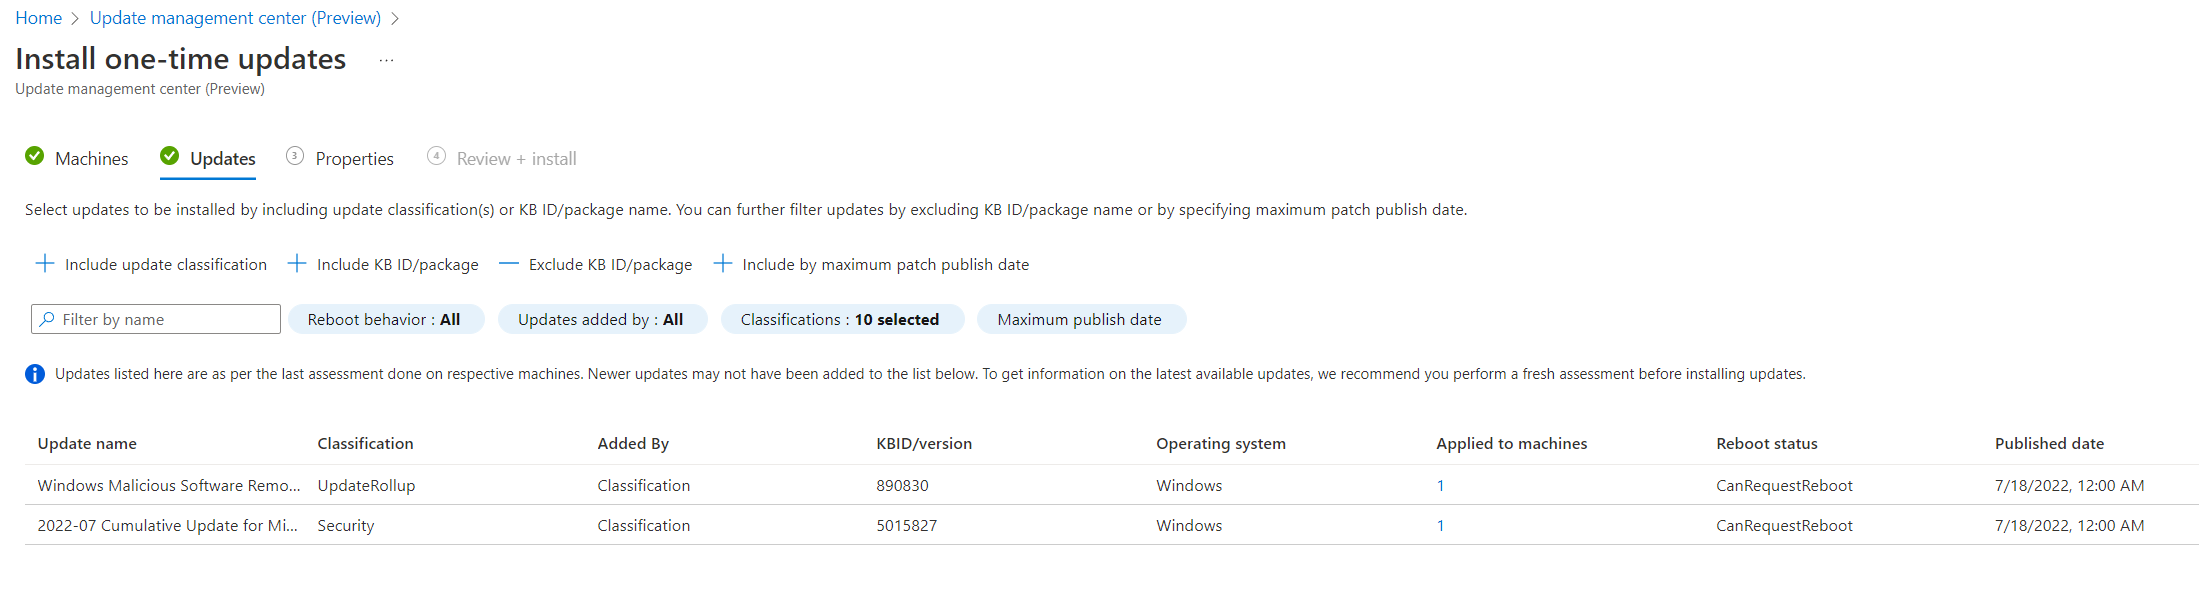
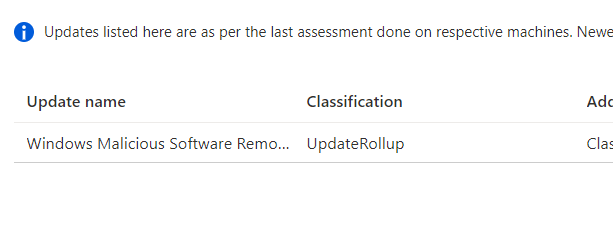
Creating a One-time update
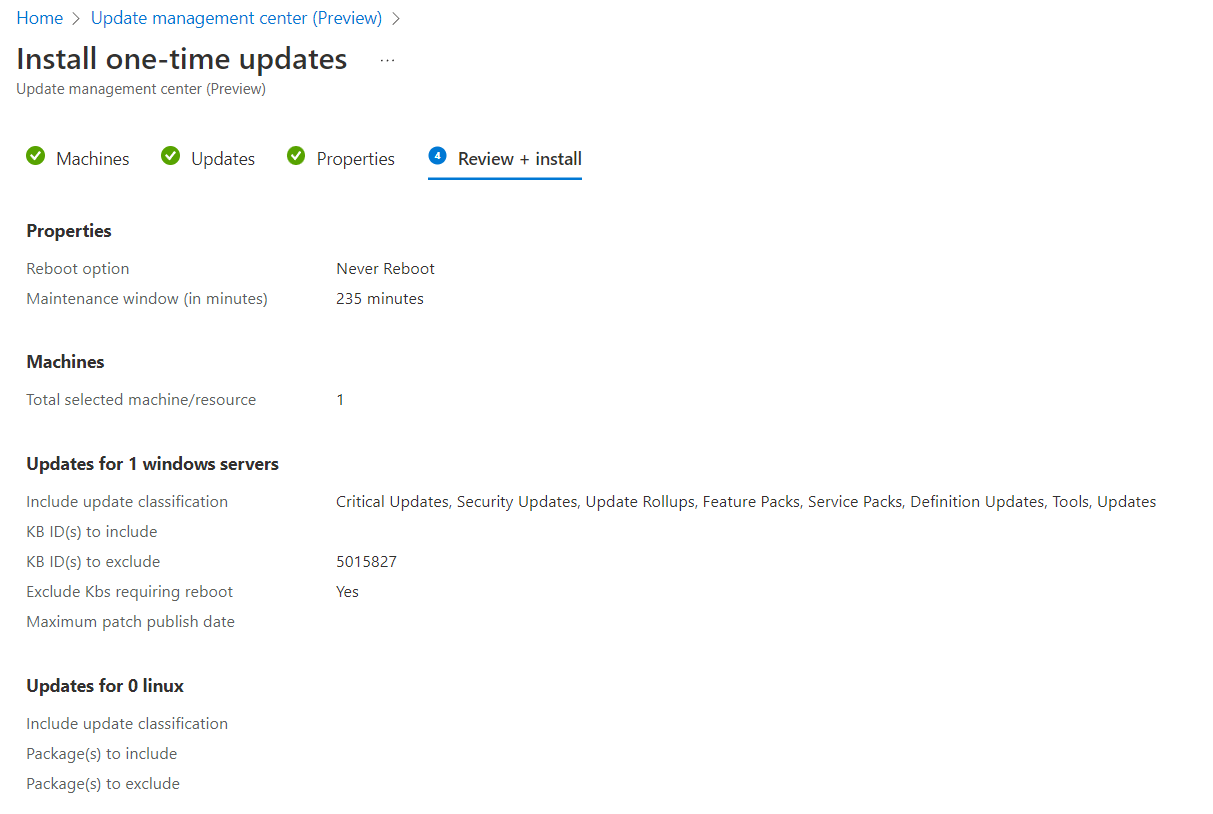
The easiest way to apply updates is by pushing them instantly using “One-Time update” at the top of the overview page. If you’re coming from Intune you might know this as “expedite update” – but this here is a lot faster. Right now, this can only be done for up to 20 machines at a time however. You select the updates you want by filtering the updates that are missing on those machines. That means it is a requirement that the servers you want to patch have reported this information. You can also filter by KB or publishing date if the category filter alone isn’t enough.
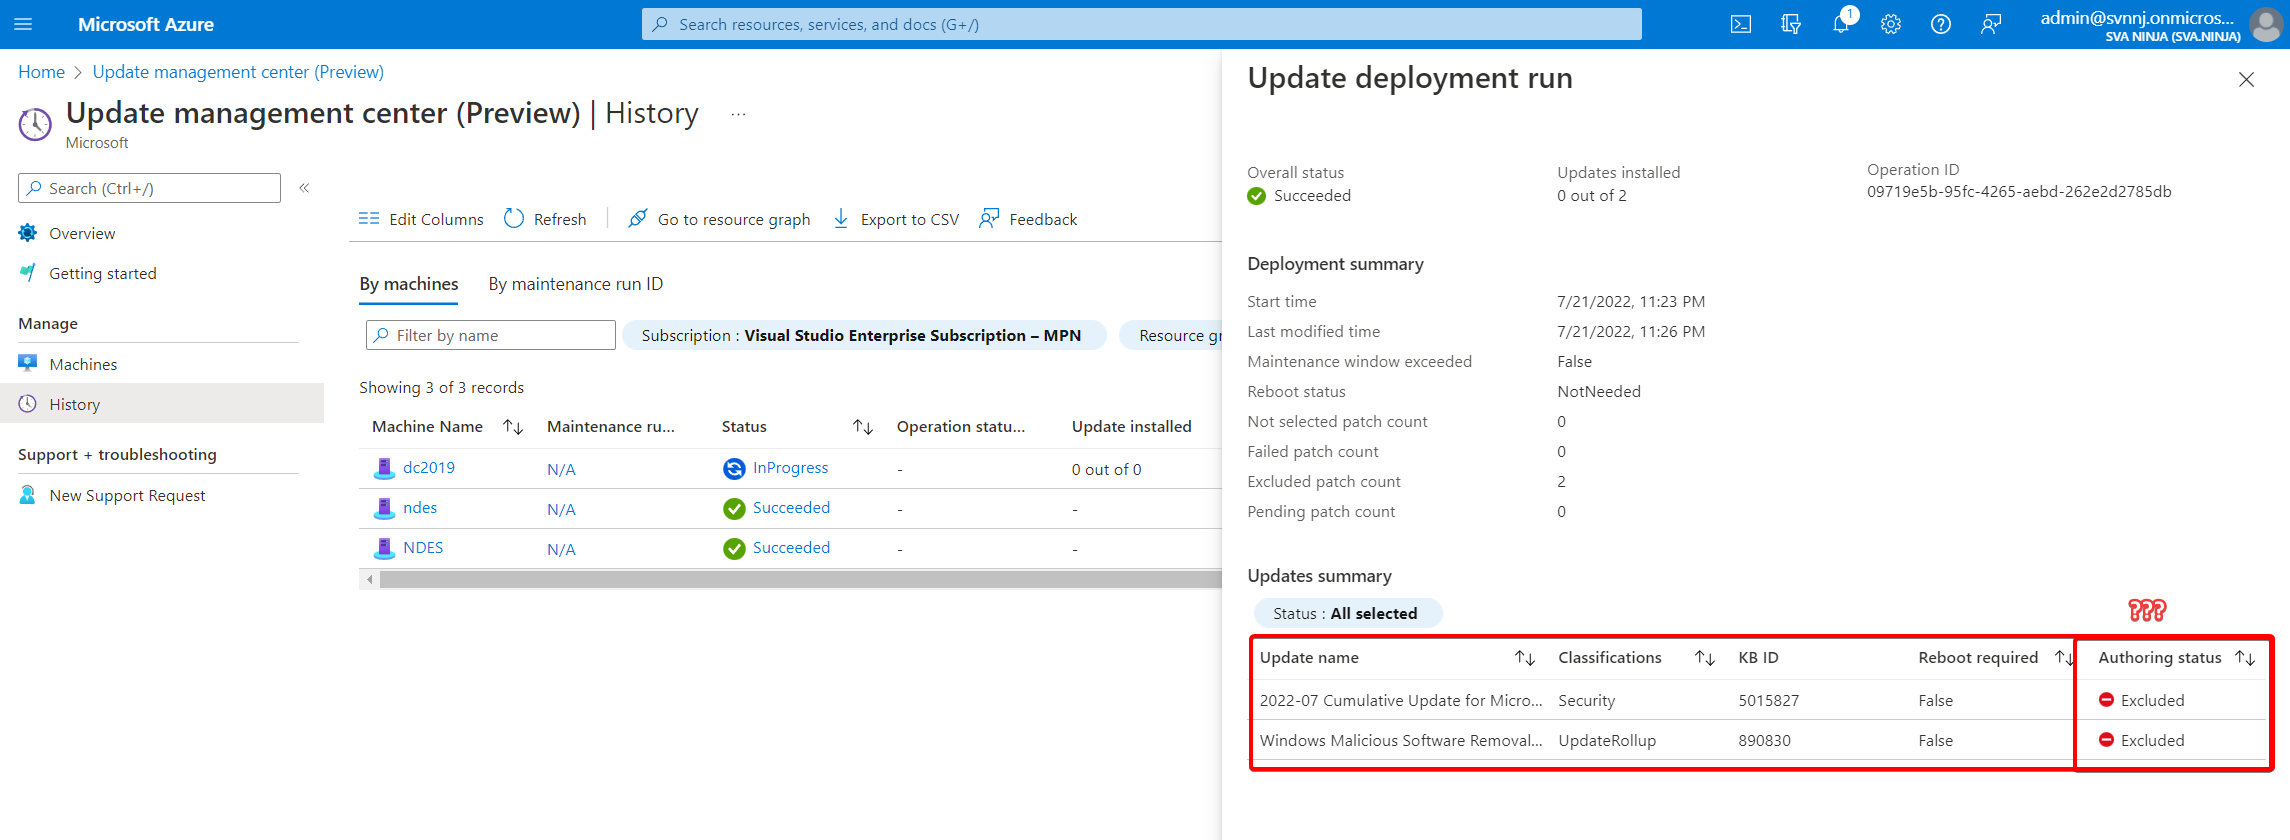
Select your reboot option and maintenance window and hit the “install” button. The last couple of pictures at the very end of the next gallery will show an “0 out of 0” for “update” (sic!) installed, because that server is still managed by ConfigMgr. No updates have been installed on that machine. Why it shows “excluded” under the authoring status for that machine I don’t know. I also don’t know why I got a “Your unsaved edits will be discarded” warning once I confirmed my settings ¯\_(ツ)_/¯.


Creating a Scheduled update
Using the “Scheduled Updates” from the overview will give you a way to schedule update installation – and, contraire to WaaS, allow you to exclude certain updates by KB. This will create something called “Maintenance Configuration” (MC) in the background. Unlike the One-time update these do not have a machine limit. You select to which Resource Group you want to deploy this MC and from which region these machines should be. Selecting “Guest” requires you to set a schedule and – unsurprisingly – you can set these similar to how you would in ConfigMgr. The updates are selected in the very same way, so I won’t explain that again.
You cannot provide any “available” time. If no other system is managing the Updates, they will be downloaded and installed when the maintenance window begins on the day and time specified. The docs state that a combination with WSUS and WUA settings is possible however even including SCUP updates. This would be perfect for a WSUS/SCUP/PatchMyPC combination. But, as I said in the beginning of this blog, I want to shift the workloads from ConfigMgr so – for now – this is untested on my side. I do know that the ConfigMgr doesn’t approve updates on the WSUS, so the client won’t be able to see and install them as is evident by the test case above.
Gotchas
- Enrolled machines will send a heartbeat every 30 seconds, if not they’re not shown as “connected”
- Extensions get installed only and only when an action from the UMC requires it to be installed
- Relevant Extensions are WindowsOsUpdateExtension and WindowsPatchExtension
- Update information will only be available after the first assessment which isn’t done automatically
- Update information is not synched from Microsoft Update, but from the machines.
- That means you can only schedule specific updates, if the machines have reported it missing
- Update scans run every 24 hours – if set up
- If ConfigMgr is still managing the updates, they will not be installed. They’re not approved on the WSUS so the client can’t get them.
- If a WSUS is configured as source and DisableDualScan is enabled, assessments will use the WSUS only
The Azure extensions
Note: Describing this chapter as anything but guesswork would be a lie. So take the next few lines as a “this is how I think it works” and some of “this might be interesting“. If you want to know about the UMC only you can skip this bit.
As described, certain actions will cause certain extensions to be pushed down to the server. One of which is documented for being used by the UMC in the troubleshooting section called “Microsoft.SoftwareUpdateManagement.WindowsOsUpdateExtension”. This is installed when an assessment hits the machine. It contains very simplistic command-line and PowerShell based scripts, that all seem to control the WUA (Windows Update Agent) in different ways. The names are pretty self-explanatory.
The other extension installed is called “Microsoft.CPlat.Core.WindowsPatchExtension“. This is installed when updates are being pushed (via One-Time update for example). I assume this is related to selecting the preview feature earlier. It is very same-y in structure to the other extension and interestingly both contain a “WindowsVmUpdateExtension.exe” and several other similar files. Some are in very different versions (1.0.17.52 WindowsOSUpdatesExtension and 10.15.714 WindowsPatchExtension for WindowsVmUpdateExtension). Both of these are unfortunately signed with a cert from an unknown root certificate called “ameroot” (Thumbprint 413e8aac6049924b178ba636cbaf3963ccb963cd) – maybe someone played a little too much WoW. Keep this in mind when you cannot execute these extensions because the signature isn’t valid. Both extensions life under “C:\Packages\Plugins”. Extension logs can be found in “C:\ProgramData\GuestConfig\extension_logs” – and speaking of logs…
The log folders for both extensions contain cmd_execution_<number>_stderr and cmd_execution_<number>_stdout and will provide more information about what commands have been executed and how. While this can technically be triggered on the machine itself, its probably more useful (and supported) to run these by using Azure itself programmatically.

One-time update findings
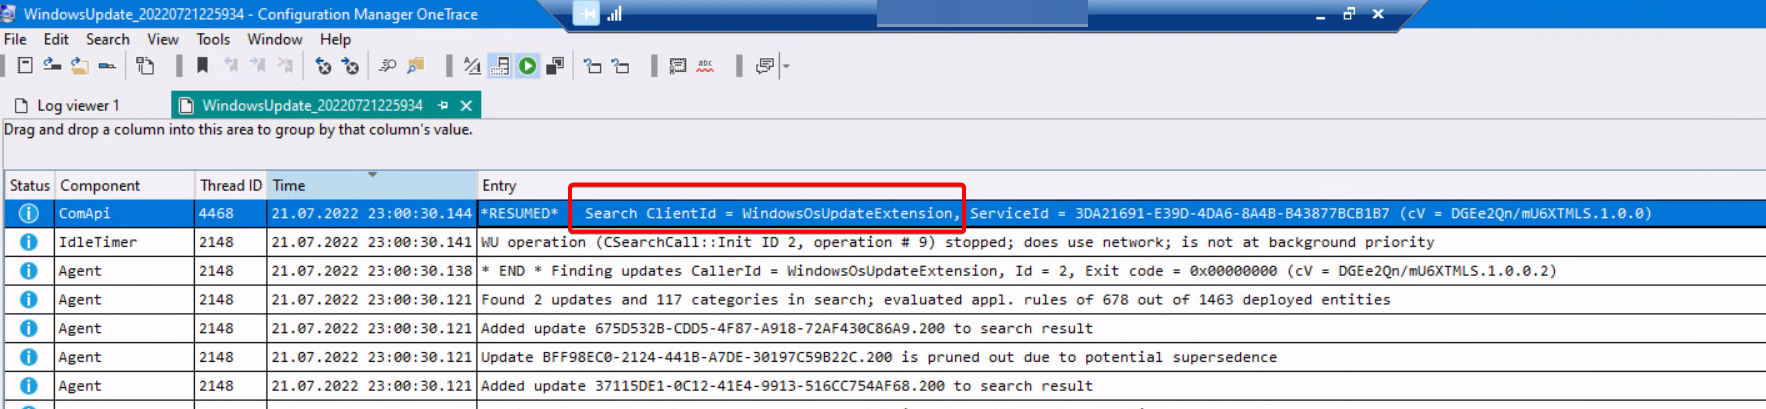
Using OneTrace from the SupportCenter (a tool available in ConfigMgr) I took a peek at what the Windows-Update log shows during the Assessment and surprisingly it shows “Azure VM Guest Patching” or “WindowsOsUpdateExtension” as the ClientID being the trigger. Update download and installation with the One-time update are controlled by a different instance called “MoUpdateOrchestrator”. For comparison, actions by the CCM use “CcmExec”. This should help in case one needs to figure out which management system “done did it”.


Assessment findings
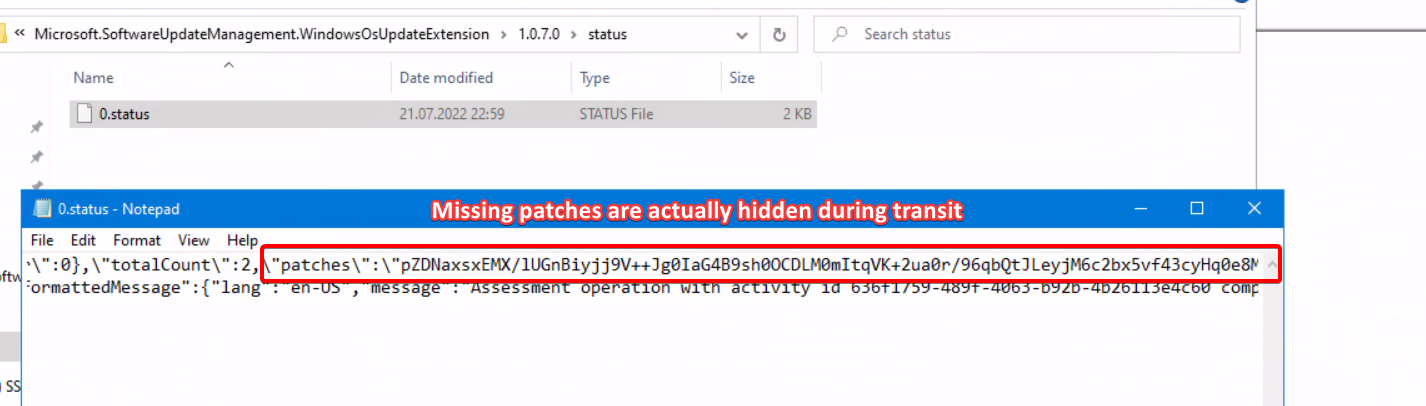
Another interesting bit I found while searching through the files from the WindowsOsUpdateExtension is that the json called “0.status” that keeps incrementing in name. These actually contain the update information (from the WUA scan) and are sent in an unreadable way. Knowing which patches are missing for a system is valuable information to an attacker, so kudos to the person who thought of adding some security here. And yes, it is a very long string.
ConfigMgr and UMC
The ConfigMgr still has a ton of knobs and cogs that can be finely tuned. Compared to that, the UMC still looks like a hacked together solution (see chapter “The Azure extensions”), that only exists because customers have a dire need for it. But then again, ConfigMgr isn’t the the most stable solution either sometimes, you just have more control than over the Blackbox named Azure. I will say though UMC is a very good start and a better solution that what AA offered already, because it doesn’t require a Log Analytics workspace or AA account to be setup. As always in these cases: it depends.
Conclusion
When I read about what Update Management Center does and how its basically a cleaner cut version from the Azure Automation I wasn’t sure what to think about it. I expected, that the functionality would be basically the same with some fresh dashboard and a cleaner overview. And… that is kind of what we got. The initial setup can be done in an hour, tops, if you have a checklist to work through and know your way around Azure. That includes being able to assess and install updates instantly on the onboarded servers.
I know, that Microsoft wants your company to move other modes of operation, away from IaaS to PaaS or SaaS where possible. But still, very many applications rely on on-premises hardware or cannot be easily moved due to legal reasons. So the UMC is a better answer than AA to a question that I often get from customers which is “Fine, we can manage our endpoints with Intune instead of ConfigMgr, but what about servers?”.
Here’s a business idea for free: Create a tool that leverages the API and make it so, that its similar to the Orchestration groups in ConfigMgr. Right now that is the thing that is still dearly missing in the Update Management Center.
Thanks for reading!